HOW TO MAKE A DISCORD BOT IN PYTHON?
- What Discord is
- Why discord.py is so valuable
- How to make a Discord bot in the Developer Portal
- How to get the link and invite the bot to your server
- How to install all necessary components to make a discord bot in python
- How to create main.py and write the code to make the bot online
- How to make and use your first command
WATCH THE TUTORIAL IN HINDI :
What Is Discord?
Discord is a voice and text communication platform for gamers.
Players, streamers, and developers use Discord to discuss games, answer questions, chat while they play, and much more. It even has a game store, complete with critical reviews and a subscription service. It is nearly a one-stop shop for gaming communities.
While there are many things you can build using Discord’s API's, this tutorial will focus on a particular learning outcome: how to make a Discord bot in Python.
What Is a Bot?
Discord is growing in popularity. As such, automated processes, such as banning inappropriate users and reacting to user requests are vital for a community to thrive and grow.
Automated programs that look and act like users and automatically respond to events and commands on Discord are called bot users. Discord bot users (or just bots) have nearly unlimited applications.
For example, let’s say you’re managing a new Discord guild (server) and a user joins for the very first time. Excited, you may personally reach out to that user and welcome them to your community. You might also tell them about your channels or ask them to introduce themselves.
The user feels welcomed and enjoys the discussions that happen in your guild(server) and they, in return, invite friends.
Over time, your community grows so big that it’s no longer feasible to personally reach out to each new member, but you still want to send them something to recognize them as a new member of the guild.
With a bot, it’s possible to automatically react to the new member joining your guild(server). You can even customize its behavior based on context and control how it interacts with each new user.
This is great, but it’s only one small example of how a bot can be useful. There are so many opportunities for you to be creative with bots, once you know how to make them.
Note: Although Discord allows you to create bots that deal with voice communication, this article will stick to the text side of the service.
There are two key steps when you’re creating a bot:
- Create the bot user on Discord Developer Portal and invite it to your guild.
- Write code that uses Discord’s APIs and implements your bot’s behaviors.
In the next section, you’ll learn how to make a Discord bot in Discord's Developer Portal.
HOW TO MAKE A DISCORD BOT IN DEVELOPER PORTAL?
Before you can dive into any Python code to handle events and create exciting automations, you need to first create a few Discord components:
- An account
- An application
- A bot
- A guild
You’ll learn more about each piece in the following sections.
Once you’ve created all of these components, you’ll tie them together by registering your bot with your guild.
You can get started by heading to Discord's Developer Portal.
Creating a Discord Account
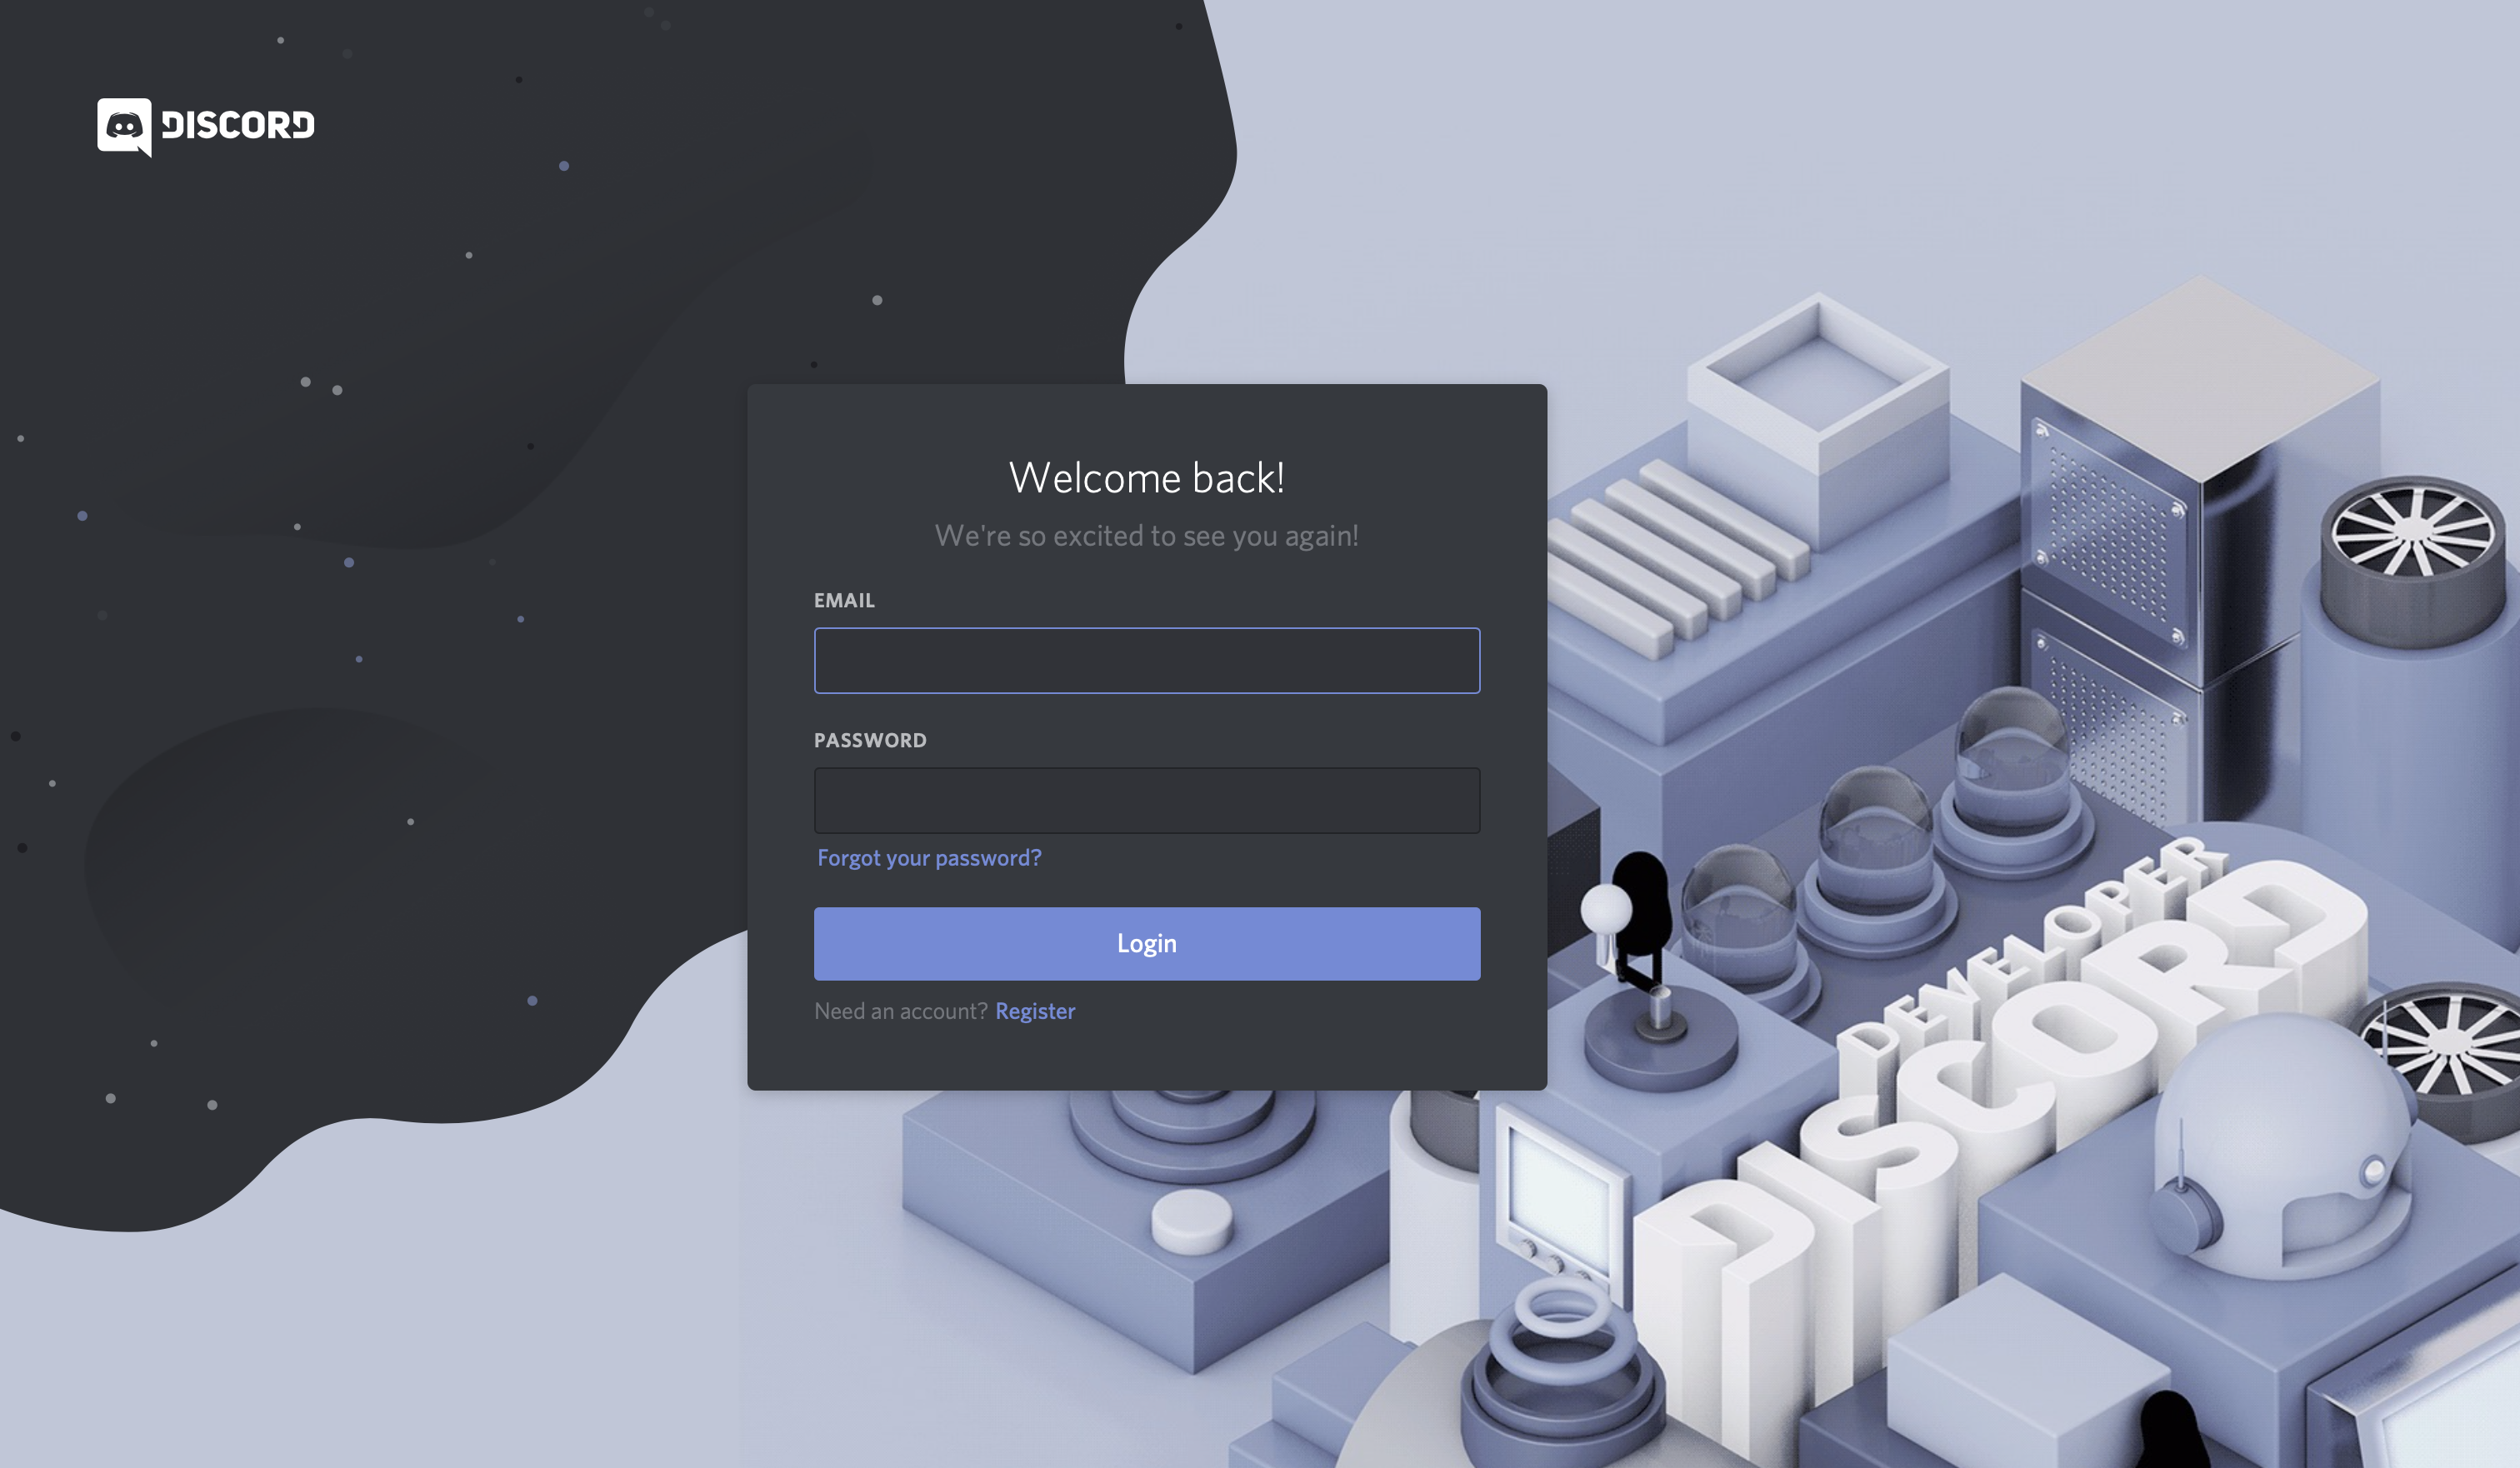
The first thing you’ll see is a landing page where you’ll need to either login, if you have an existing account, or create a new account:
If you need to create a new account, then click on the Register button below Login and enter your account information.
Important: You’ll need to verify your email before you’re able to move on.
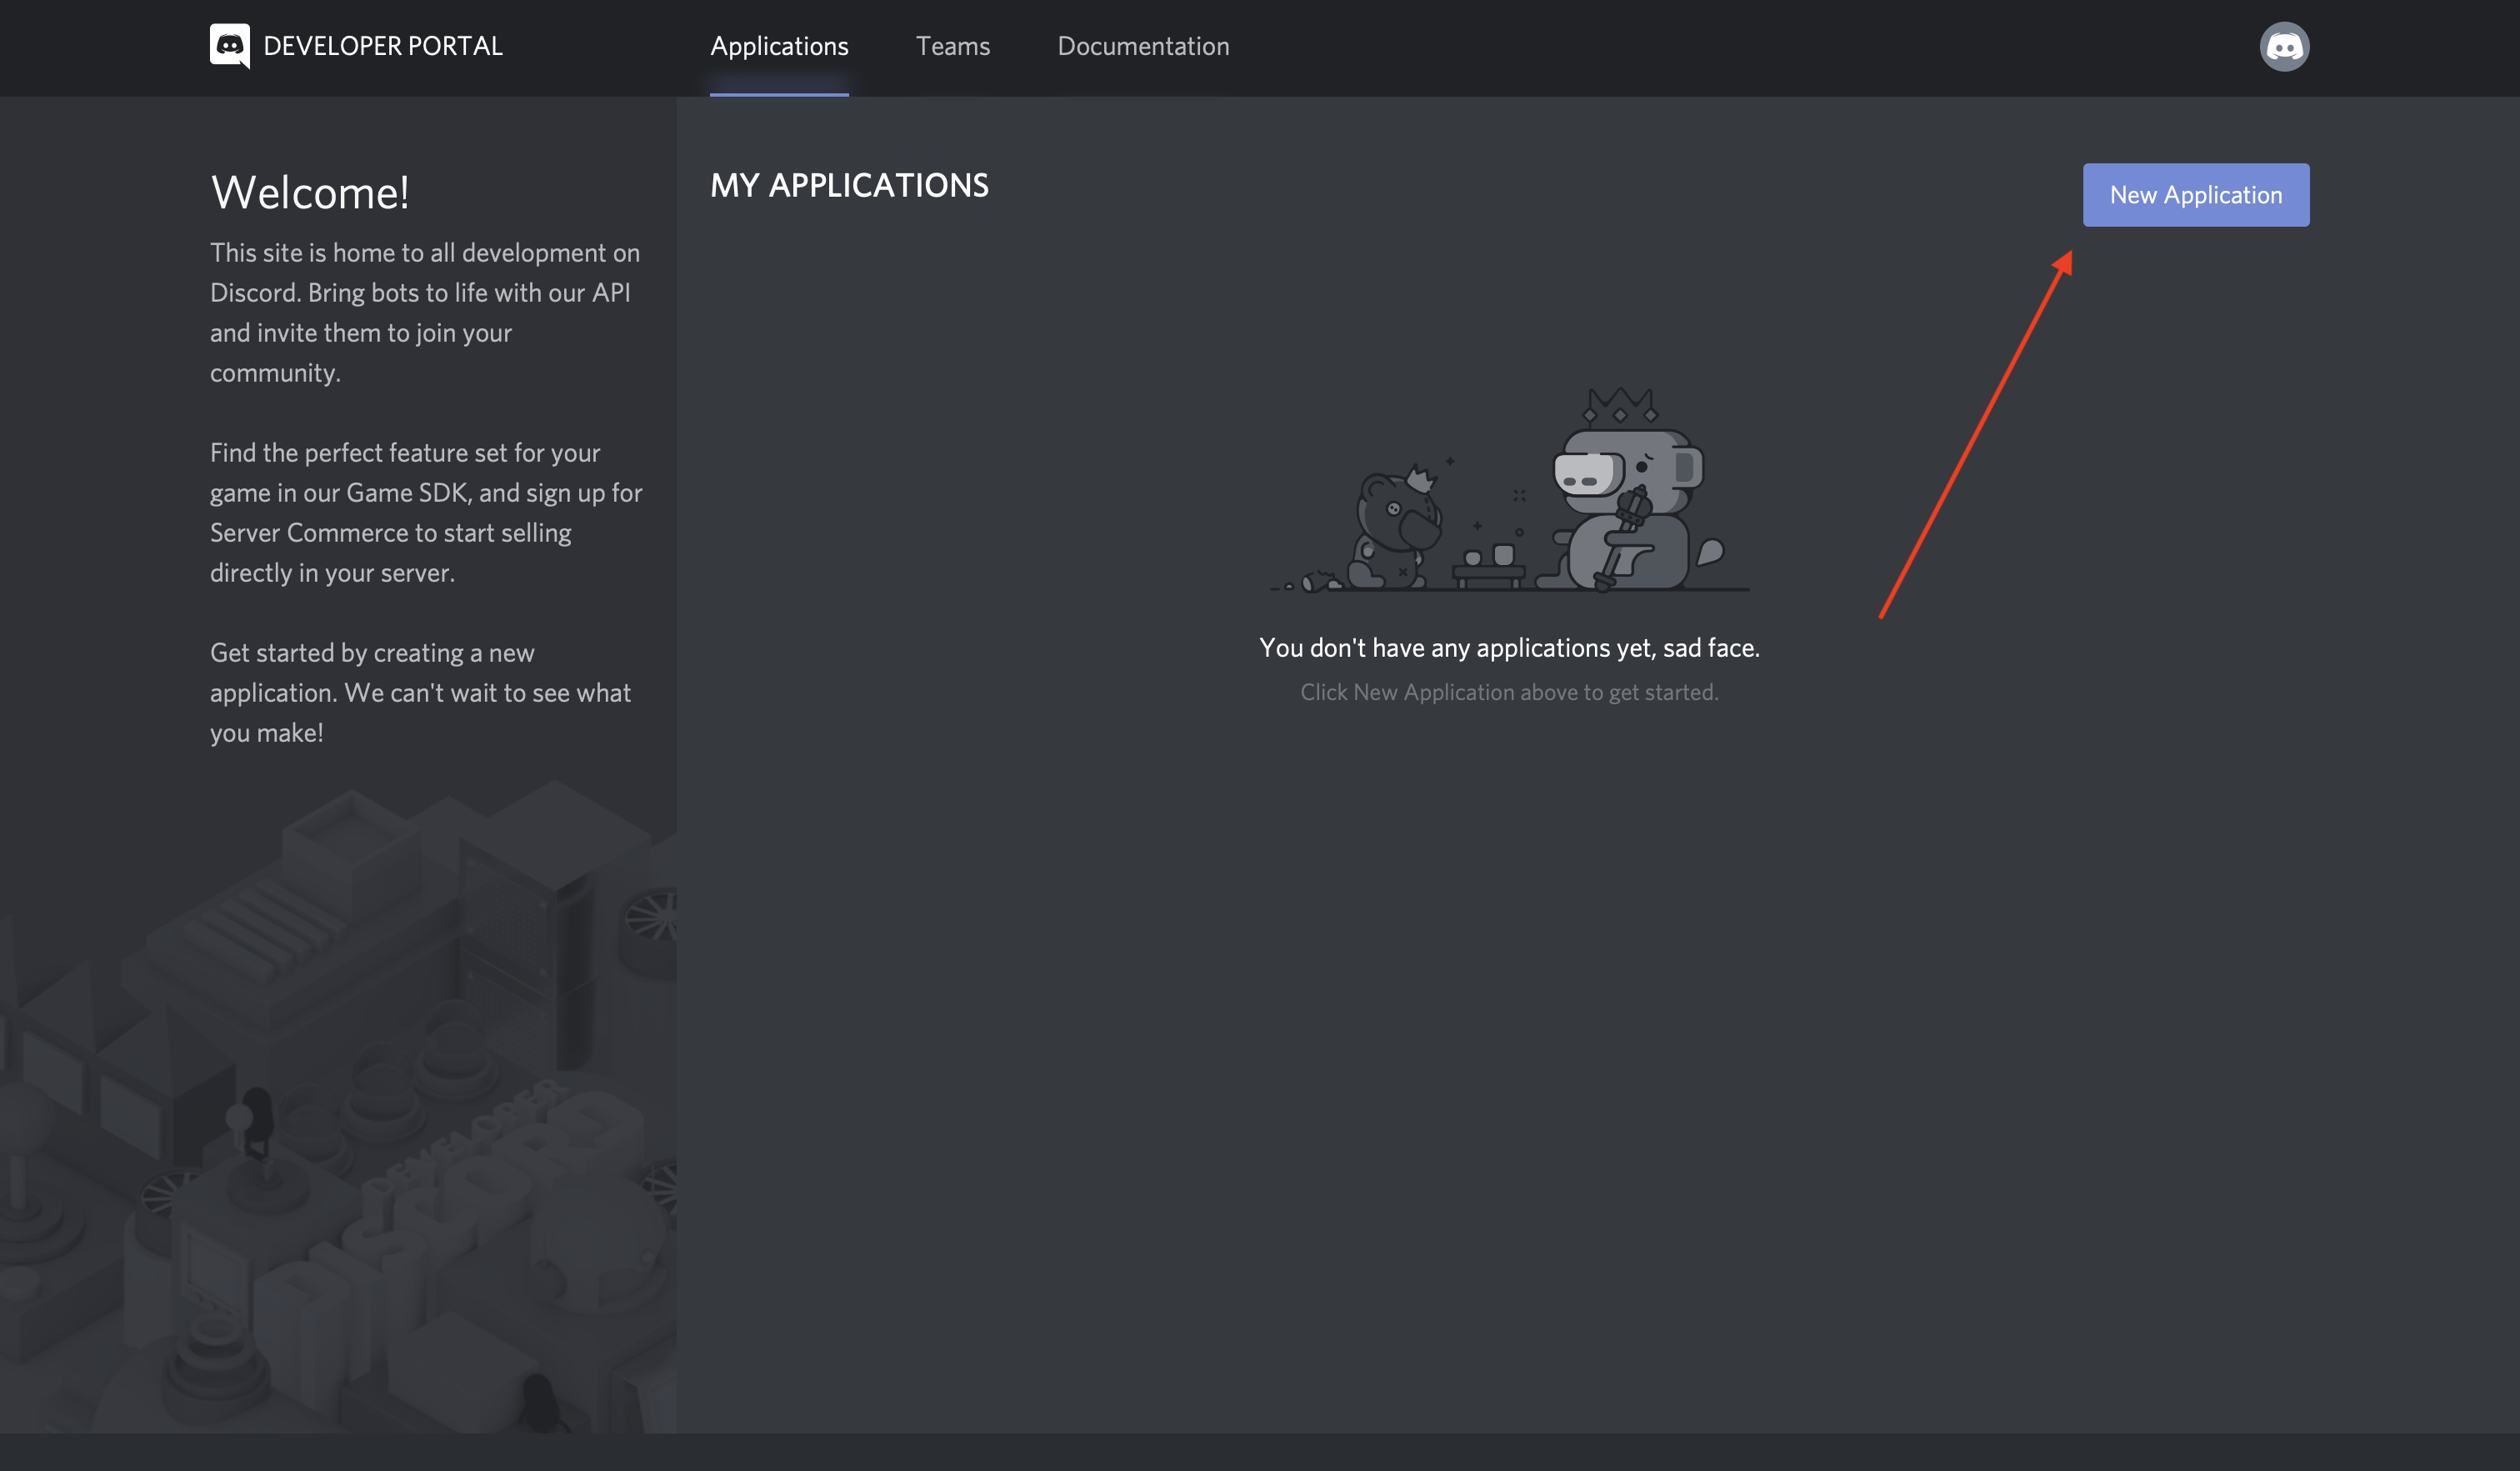
Once you’re finished, you’ll be redirected to the Developer Portal home page, where you’ll create your application.
Creating an Application
An application allows you to interact with Discord’s APIs by providing authentication tokens, designating permissions, and so on.
To create a new application, select New Application:
Next, you’ll be prompted to name your application. Select a name and click Create:
Congratulations! You have created your first application and and you can see the details on the result screen :
Keep in mind that any program that interacts with Discord APIs requires a Discord application, not just bots. Bot-related APIs are only a subset of Discord’s total interface.
However, since this tutorial is about how to make a Discord bot, navigate to the Bot tab on the left-hand navigation list.
CREATING A BOT
As you learned in the previous sections, a bot user is one that listens to and automatically reacts to certain events and commands on Discord.
For your code to actually be manifested on Discord, you’ll need to create a bot user. To do so, select Add Bot:
CREATING A GUILD (SERVER)
A guild (or a server, as it is often called in Discord’s user interface) is a specific group of channels where users congregate to chat.
Note: While guild and server are interchangeable, this article will use the term guild primarily because the APIs stick to the same term. The term server will only be used when referring to a guild in the graphical UI.
For example, say you want to create a space where users can come together and talk about your latest game. You’d start by creating a guild. Then, in your guild, you could have multiple channels, such as:
- General Discussion: A channel for users can talk about whatever they want.
- Announcements: A channel for you to announce game updates, server updates and other important things that you want to tell about to all your server members.
- Welcome: A channel where all the new users who join your server are welcomed.
Once you’ve created your guild, you’d invite other users to populate it.
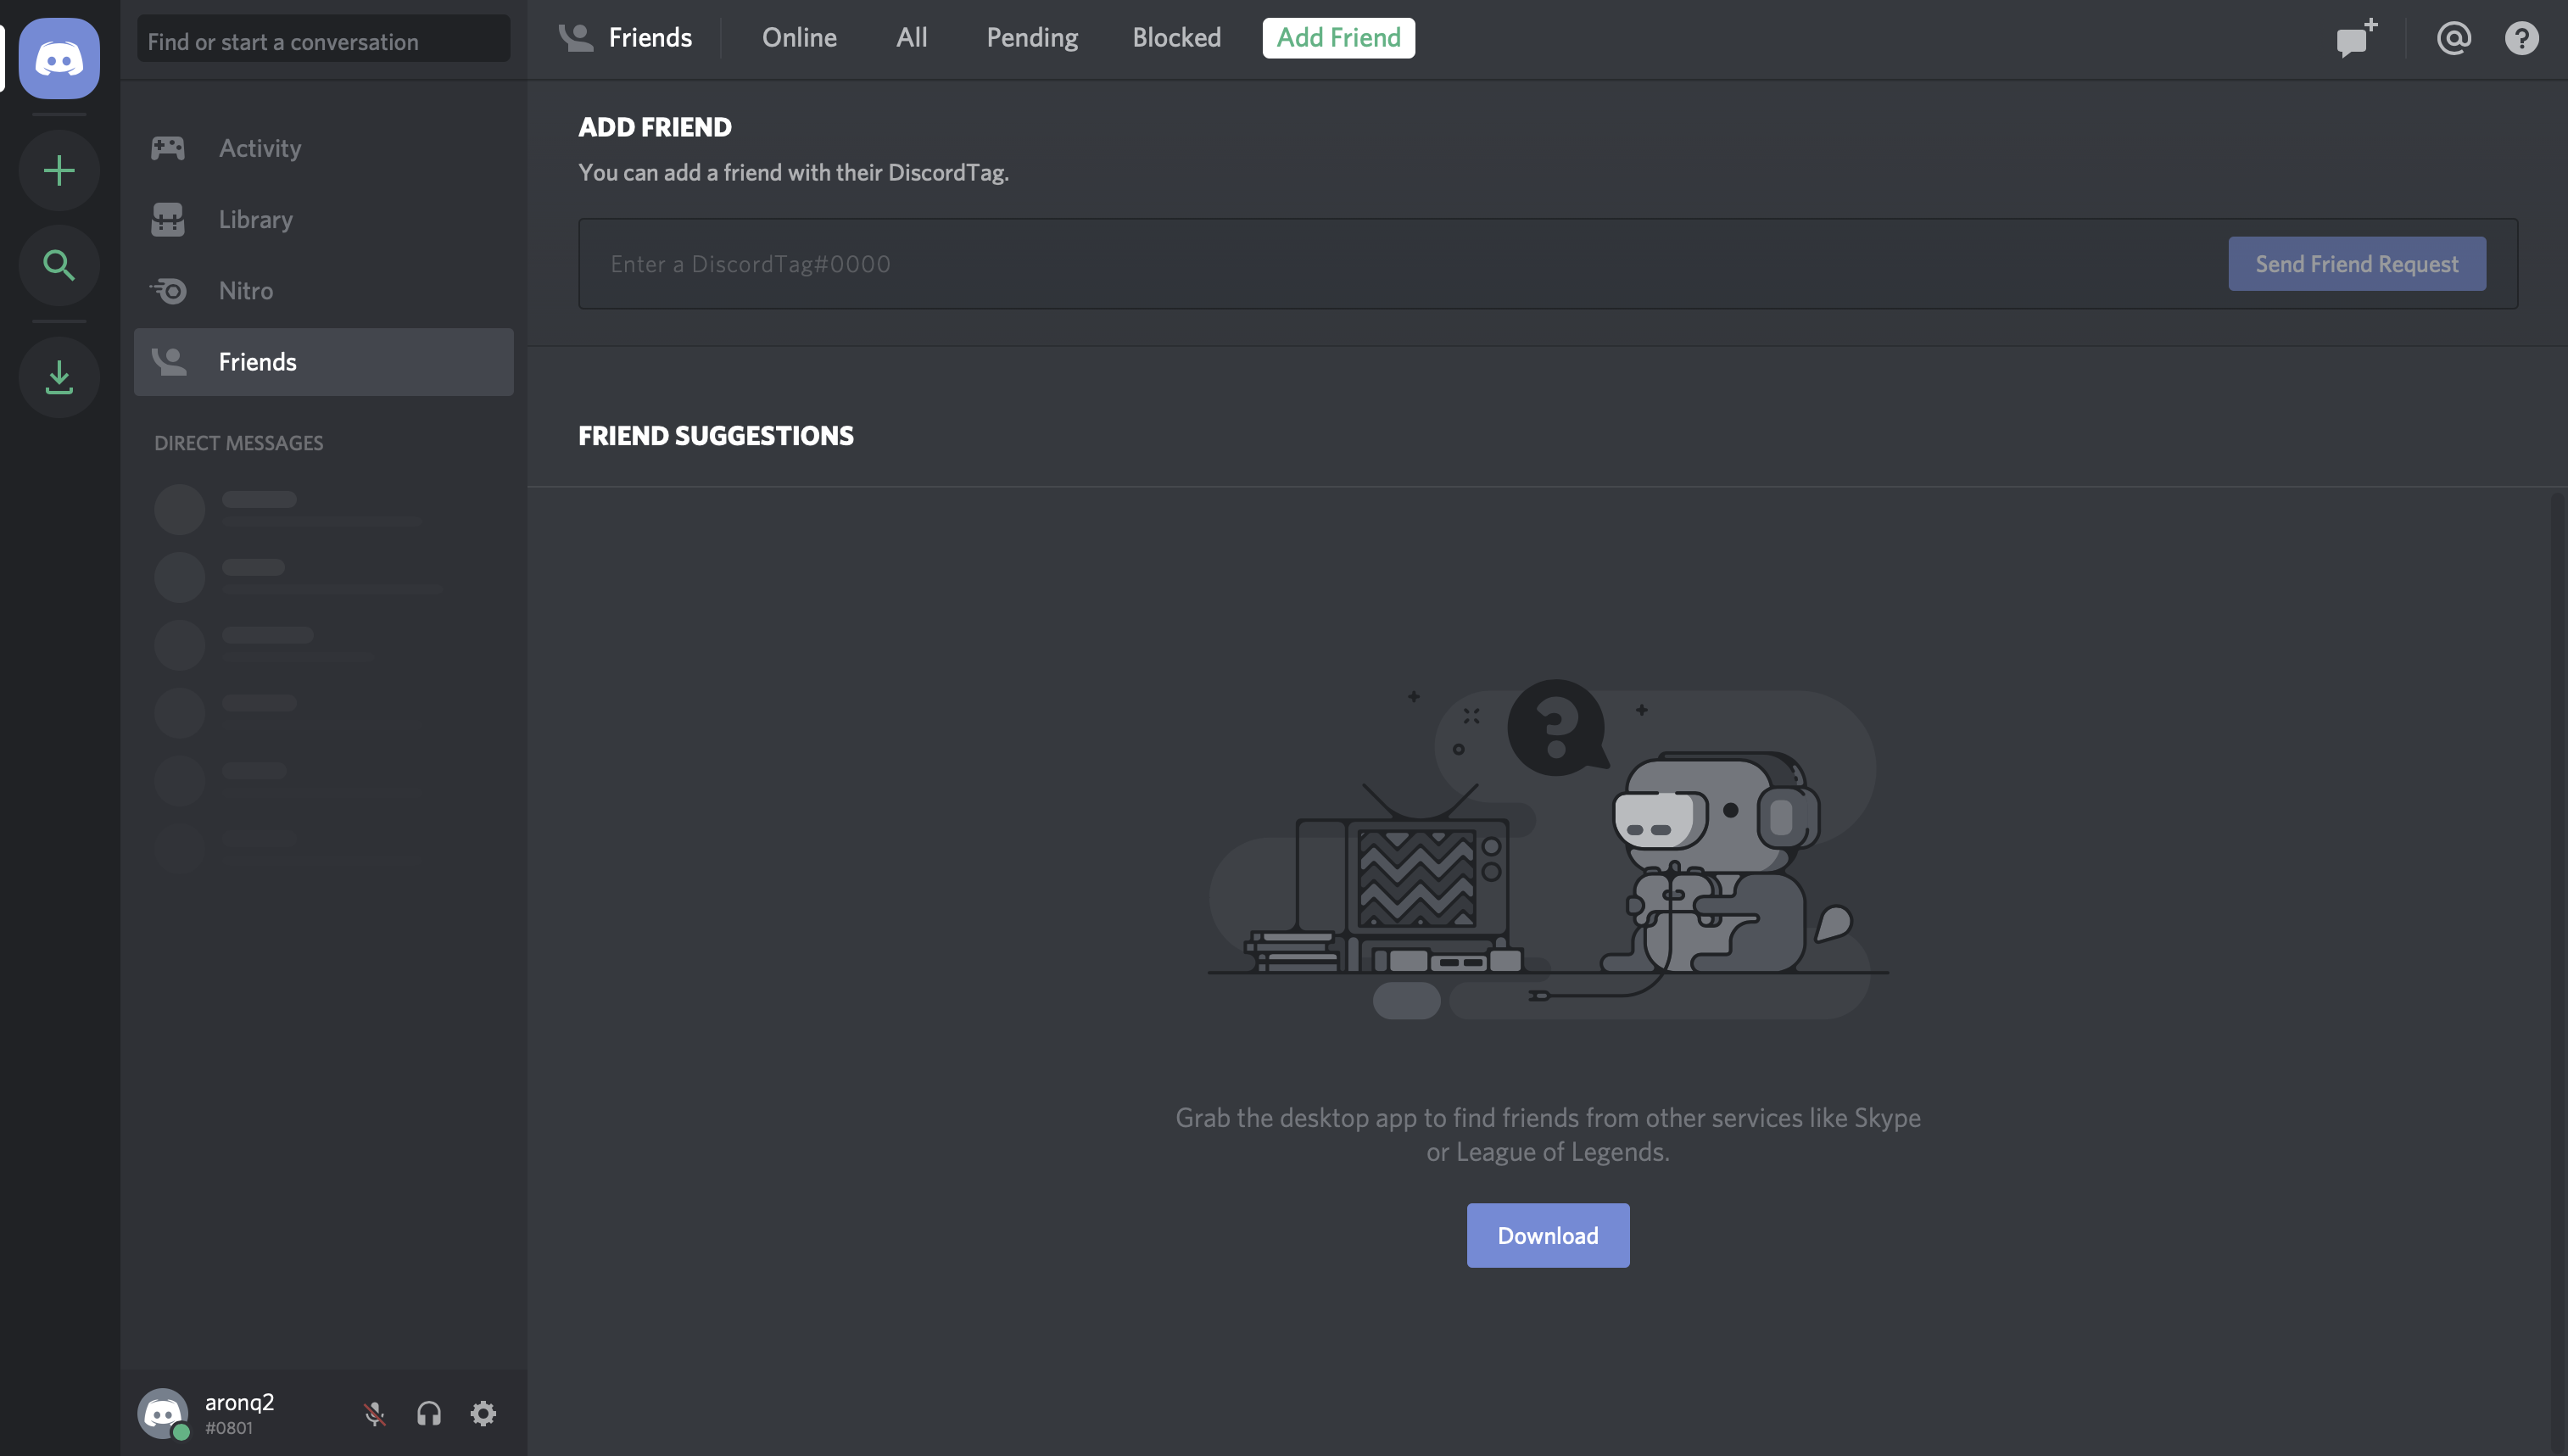
So, to create a guild, head to your Discord home page:
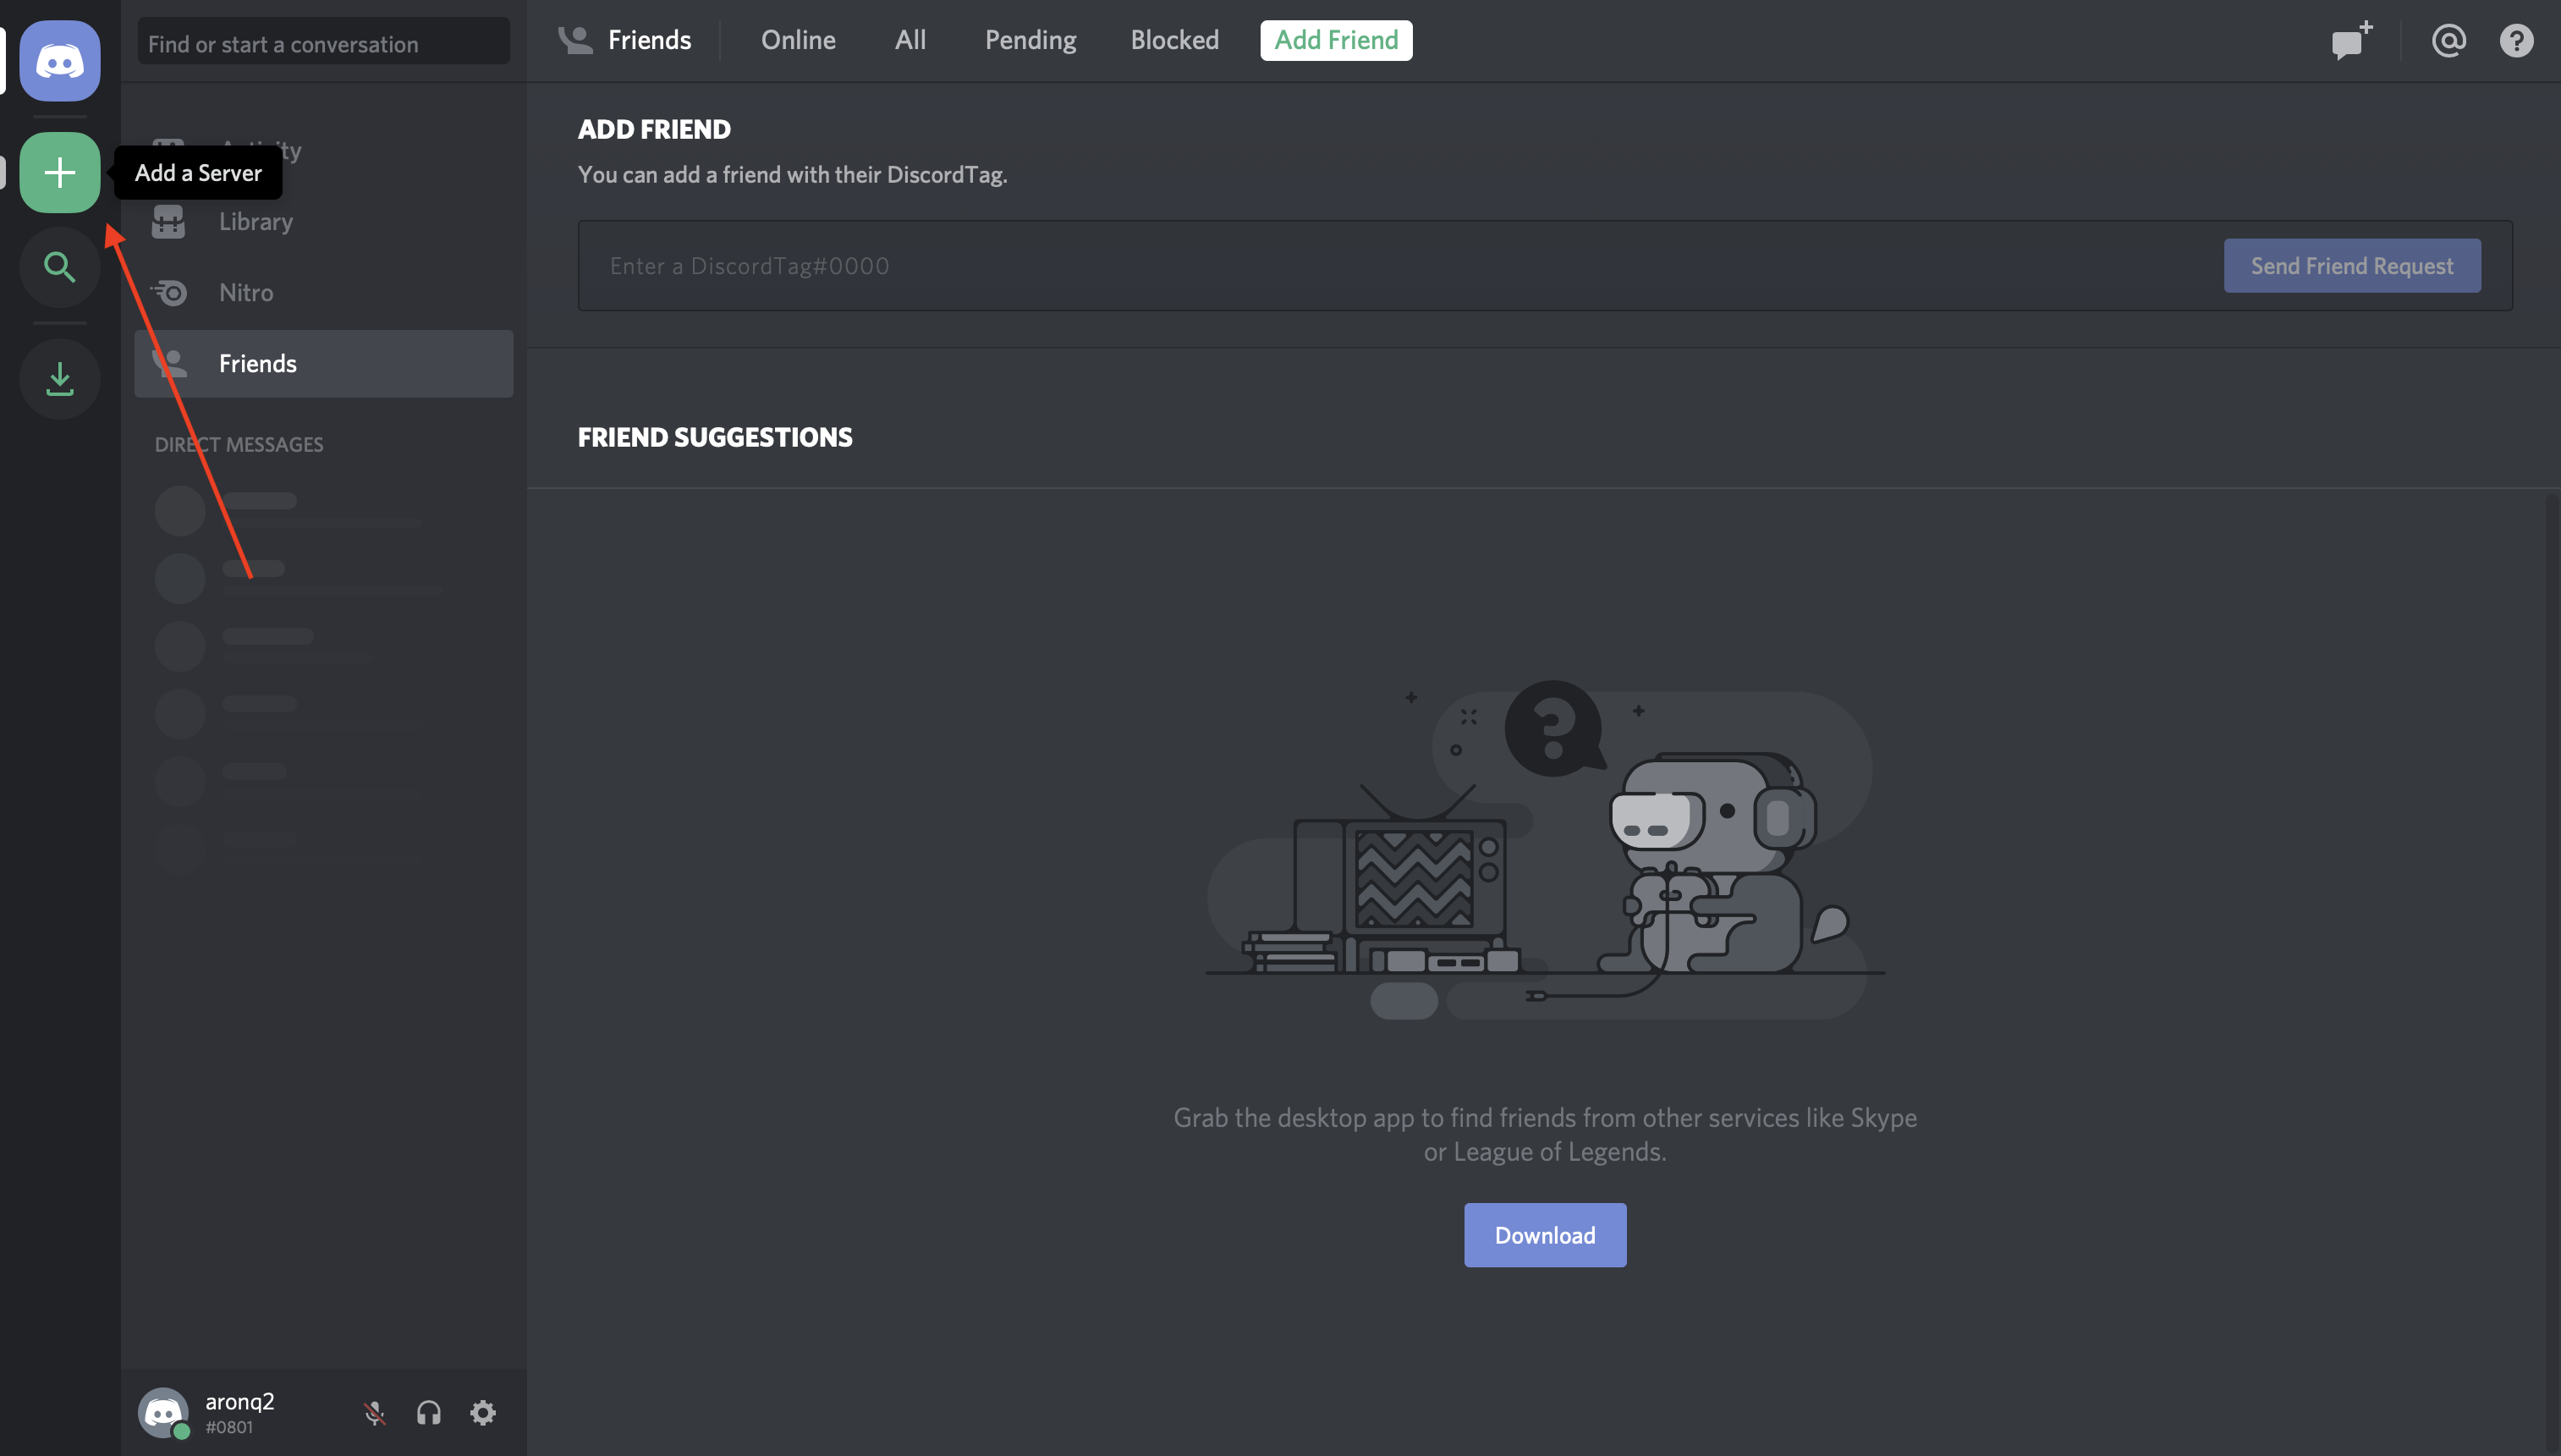
From this home page, you can view and add friends, direct messages, and guilds. From here, select the + icon on the left-hand side of the web page to Add a Server:
This will present two options, Create a server and Join a Server. In this case, select Create a server and enter a name for your guild:
Once you have created a guild , you'll be able to see all the channel names on your left and the users list on your right:
INVITE THE BOT
A bot can’t accept invites like a normal user can. Instead, you’ll add your bot using the OAuth2 protocol.
Technical Detail: OAuth2 is a protocol for dealing with authorization, where a service can grant a client application limited access based on the application’s credentials and allowed scopes.
To do so, head back to the Discord's Developer Portal and select the OAuth2 page from the left-hand navigation:
From this window, you’ll see the OAuth2 URL Generator.
This tool generates an authorization URL that hits Discord’s OAuth2 API and authorizes API access using your application’s credentials.
In this case, you’ll want to grant your application’s bot user access to Discord APIs using your application’s OAuth2 credentials.
To do this, scroll down and select bot from the SCOPES options and Administrator from BOT PERMISSIONS.
Now, Discord has generated your application’s authorization URL with the selected scope and permissions.
Disclaimer: While we’re using Administrator for the purposes of this tutorial, you should be as granular as possible when granting permissions in a real-world application. You can give some basic permissions to the bot if you don't want it do much .
Select Copy beside the URL that was generated for you, paste it into your browser, and select your guild from the dropdown options:
Click Authorize, and you’re done!
Note: You might get a reCAPTCHA before moving on. If so, you’ll need to prove you’re a human by filling the reCAPTCHA.
If you go back to your guild, then you’ll see that the bot has been added:
In summary, you’ve created:
- An application that your bot will use to authenticate with Discord’s APIs.
- A bot user that you’ll use to interact with other users and events in your guild.
- A guild in which your user account and your bot user will be active.
- A Discord account with which you created everything else and that you’ll use to interact with your bot.
Now, you know how to make a Discord bot using the Developer Portal. Next comes the fun stuff: implementing your bot in Python because the bot is still offline!
GETTING ESSENTIALS
- A code editor or an IDE: You can choose between any code editor currently present in the market but I personally recommend using VISUAL STUDIO CODE.
- Python: You can download any latest version of python and if you already have python installed on your system , you can check the version by giving following command in command prompt or terminal:
- Discord.py: It is a Python library that exhaustively implements Discord’s APIs in an efficient and Pythonic way. Install it by using following command in cmd or terminal:
pip install discord.py
WRITING OUR FIRST CODE
- Open the Visual Studio Code
- Make a folder with any name and at any desired location
- Make a file with the name of your choice but remember to keep the extension .py
- Open this file with VS code if you haven't opened it yet and start writing code.
 import discord
 from discord.ext import commands, tasks
 client = commands.Bot(command_prefix='-')
 token = 'YOUR TOKEN HERE'
 @client.event
 async def on_ready():
   print("Bot is online!")
 client.run(token)
- In place of "YOUR TOKEN HERE" you need to put your bot token .
A Client is an object that represents a connection to Discord. A Client handles events, tracks state, and generally interacts with Discord APIs.
Here, you’ve created a Client and implemented its on_ready() event handler, which handles the event when the Client has established a connection to Discord and it has finished preparing the data that Discord has sent, such as login state, guild and channel data, and more.
In other words, on_ready() will be called (and your message will be printed) once client is ready for further action. You’ll learn more about event handlers later in this article.
When you’re working with secrets such as your Discord token, it’s good practice to read it into your program from an environment variable. Using environment variables helps you:
- Avoid putting the secrets into source control
- Use different variables for development and production environments without changing your code.
HOW TO GET BOT TOKEN
Conclusion
Congratulations! Now, you’ve learned how to make a Discord bot in Python. You’re able to build bot and making a connection with your bot.
In this tutorial, you learned the first step of creating your own Discord bot. You now know:
- What Discord is
- Why
discord.pyis so valuable - How to make a Discord bot in the Developer Portal
- How to create a Discord connection in Python
- How to create a
Botconnection
Also the bot do nothing by now , it just goes online but you don't need to worry It was just your first step of creating an advanced bot. You can read my further tutorials here
You can even watch my video tutorials in hindi language on my youtube Channel.
If you have any queries , Join Discord.


1 Comments
Nice Work!
ReplyDeleteSpamming is prohibited!